Have you ever worried about someone somehow being able to move your safe out of your home in an effort to steal your valuables? Are you concerned about making sure money, important documents, and other precious items stay safe in situations like house fires? Installing a wall safe is a solution worth considering for either predicament. Of course, you probably want to know more about why you should install a wall safe as well as how to install one. Luckily, you will learn how to install a wall safe by continuing to read this blog.
Why Install A Wall Safe?
You can reap many benefits by installing a wall safe in your home. With this kind of safe, you can place it in a discreet part of your wall to make it difficult for visitors or intruders to spot at first glance. This safe is also affordable, easy to install, accessible, and also saves plenty of space. Additionally, you can invest in a wall safe that either already comes with high-level security features or get security features that can be added to enhance the security of your wall safe.
How To Install A Wall Safe In 5 Steps
With your new understanding of the benefits of having a wall safe, you are ready to learn how to install a wall safe. The process of installing this type of safe involves the following five steps.
1. Pick A Spot On The Wall
The first part of learning how to install a wall safe is to determine where you wish to install it. Pick a location that is discreet and accessible to you and anyone else who uses it. As soon as you know where you’d like to keep it in your home, continue to the next step.
2. Take Measurements
Next, take the necessary measurements to determine the size and depth for the safe installation. The measurements of your new wall safe will serve as a guide to ensuring you have enough space to install it. Use a pencil and a level to mark the spots to cut for the safe evenly.
3. Cut Out The Space In The Wall
Now it’s time to cut out a hole in the wall and create however much space is necessary for installing a wall safe. For this step of how to install a wall safe, you’ll need a drywall saw to cut the hole. Be mindful of any electrical wires and other foundational parts when cutting the hole in the wall.
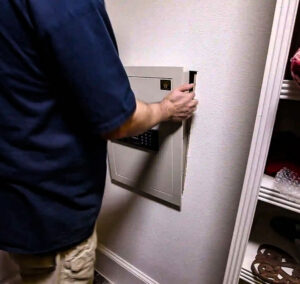
4. Insert And Secure The Safe
The insertion portion of how to install a wall safe might vary in small ways depending on the brand of wall safe you are using. For this reason, consult the appropriate user manual for details. Otherwise, this part simply involves covering the back with some wood and then gently pushing the safe into the wall. Use screws to secure your new wall safe. Just like with the insertion, refer to the user manual once again if any specific instructions are required to secure your wall safe.
5. Test The New Safe
For this last part of how to install a wall safe, it’s time to test its effectiveness. You’ll test your new safe by checking that the locking mechanism is working as it should and that the door can remain closed when locked and easily open when unlocked. Once again, you might need to check the user manual for instructions on how to test out your new wall safe properly.
ASAP Locksmith Can Help With Safes!
Knowing how to install a wall safe is just one thing you can do to ensure the safety of your valuables. However, that wall safe is only reliable if the locking mechanism works as it should. If you are facing problems with your wall safe’s locking mechanism, you can find the solutions by reaching out to us at ASAP Locksmith in Houston. Contact us today and get the most out of your new wall safe.